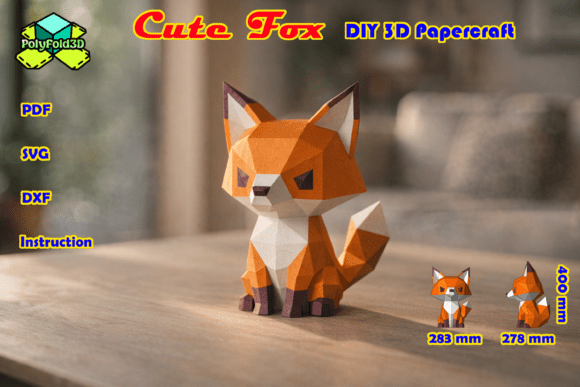
Cute Fox DIY 3D Papercraft
Papercraft has evolved far beyond simple paper folding. It is now a sophisticated hobby that blends geometry, art, and patience into tangible objects. Among the most popular subjects in this niche is the Cute Fox DIY 3D Papercraft. This model offers a unique blend of aesthetic charm and structural logic, appealing to everyone from casual crafters to professional designers looking for a quick, satisfying build. However, achieving a high-quality finish requires more than just glue and scissors; it demands an understanding of material properties and assembly techniques.
This article explores what makes this specific fox model stand out, common pitfalls that can ruin the final result, and practical advice to ensure your project turns out exactly as intended. Whether you are decorating a nursery, adding character to a home office, or simply seeking a mindful activity, getting the details right matters.
Understanding the Model Design
The Cute Fox DIY 3D Papercraft is designed using clean low-poly shapes. This geometric approach is not merely a stylistic choice; it serves a functional purpose. The balanced proportions and natural polygon flow allow the pieces to align smoothly during assembly. Unlike complex models that require internal wire armatures or plastic supports, this fox is optimized to stand stable on its own. The construction relies on precise fold lines and strategic tab placement, making it accessible to beginners while still offering enough detail to satisfy experienced papercrafters.
The model features a three-color design: orange, white, and brown. These colors are distributed across nine A4 pages, with the orange parts taking up three pages, white parts two pages, and brown parts three pages. In total, there are 56 individual pieces. This color blocking helps define the fox’s facial features and body structure without needing intricate painting or shading. The finished dimensions—283 mm in length, 278 mm in width, and 400 mm in height—create a substantial presence on any desk or shelf, large enough to be noticed but small enough to fit comfortably in standard spaces.
Common Mistakes in Papercraft Assembly
Even with clear instructions, many builders encounter issues that compromise the integrity of their creation. Recognizing these errors early can save time, materials, and frustration.
Ignoring Paper Weight and Type
One of the most frequent mistakes is using standard printer paper (typically 70–80 gsm) for a model of this size. While it might seem convenient, standard paper lacks the stiffness required to hold the 3D structure. The fox may slump, lean, or fail to stand upright. Conversely, using cardstock that is too thick (over 300 gsm) can make scoring difficult and cause the tabs to bulge, preventing clean joints.
Better Approach: Use cardstock in the range of 180–250 gsm. This weight provides enough rigidity for the legs and torso to support the head while remaining flexible enough for crisp folds. If you do not have cardstock on hand, consider laminating regular paper before cutting, though this adds thickness that must be accounted for during assembly.
Inadequate Scoring and Folding
Simply bending the paper along the fold lines often results in rounded, soft edges rather than sharp, defined creases. This lack of definition makes the low-poly aesthetic look sloppy and can misalign adjacent pieces. When assembling the 56 pieces, even a millimeter of error in angle can compound, leading to gaps or twisted forms.
Better Approach: Always score your fold lines before bending. Use a bone folder, a dull butter knife, or the back of a pair of scissors to press down firmly along each line. This creates a "memory" in the paper, ensuring that every fold snaps into place accurately. For internal corners, a slight relief cut (snipping just to the line) can help the paper lay flat without bunching.
Rushing the Gluing Process
Applying glue haphazardly or using too much adhesive can lead to visible residue, warping, and weak bonds. Many beginners squeeze glue onto large surface areas, causing the paper to buckle as it absorbs moisture. Additionally, failing to clamp or hold pieces together long enough allows the joint to shift before setting, ruining the alignment.
Better Approach: Use a PVA glue stick or a precision bottle with a fine tip for liquid glue. Apply a thin, even layer only to the tabs. Hold the pieces together firmly for at least 10–15 seconds per joint. For critical structural points, such as where the legs meet the body, consider using a small amount of stronger adhesive like cyanoacrylate (super glue) after the initial PVA set, but use sparingly to avoid burns or discoloration.
Evaluating Your Materials Before You Start
Before diving into the assembly, take a moment to evaluate your resources. The clarity of the print is paramount. Since the model relies on numbered pieces and logical grouping, blurry or faint text can lead to confusion and incorrect assembly order. Ensure your printer settings are adjusted for maximum contrast and darkness. If printing at home, check your ink levels; running out of orange ink mid-project will halt your progress.
Consider the environment in which you will work. Humidity can affect paper stability, causing it to warp or become brittle. A dry, flat workspace with good lighting is ideal. Also, verify that your cutting tools are sharp. Dull scissors can tear the paper fibers, especially around the curved ears and tail, resulting in jagged edges that detract from the clean geometric look.
Maximizing the Decorative Impact
Once assembled, the Cute Fox DIY 3D Papercraft becomes more than just a craft project; it is a decorative accent. Its warm handmade feeling brings a cozy touch to living rooms, bedrooms, studios, and children’s rooms. To enhance its visual appeal, display it on a level surface away from direct sunlight, which can fade the vibrant orange and brown tones over time. Pairing it with other minimalist decor items can highlight its geometric beauty, allowing the low-poly design to serve as a focal point.
For those interested in customization, some enthusiasts add subtle touches like glitter glue to the eyes or a tiny fabric collar, though the pure geometric form is often preferred for its modern aesthetic. Remember, the goal is to enjoy the process. The satisfaction comes not just from the final object, but from the mindfulness and precision practiced during construction.
Final Thoughts on the Craft
The Cute Fox DIY 3D Papercraft is an excellent choice for anyone looking to combine creativity with technical skill. By avoiding common pitfalls such as poor material selection, inadequate scoring, and rushed gluing, you can achieve a professional-looking result that stands the test of time. Whether you are a beginner eager to try your first 3D model or an experienced crafter seeking a relaxing weekend project, this fox offers a rewarding challenge. Take your time, follow the logical piece grouping, and appreciate the geometry that brings this charming animal to life.