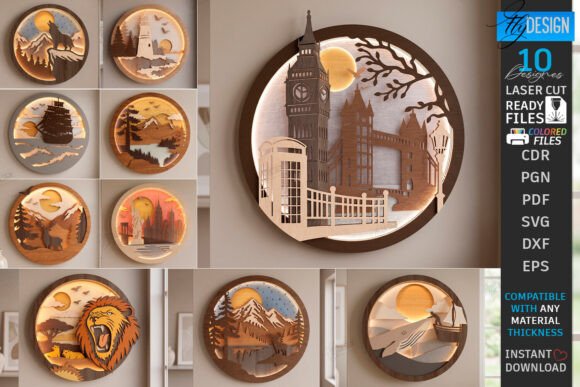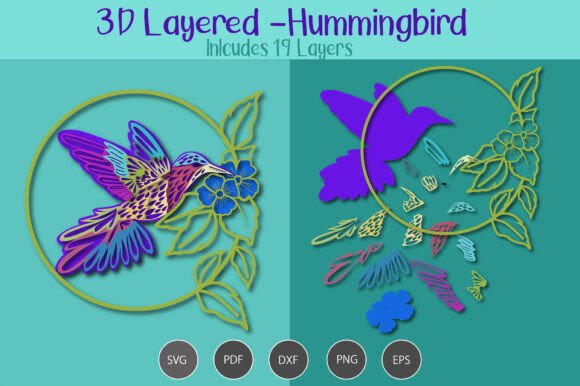
3D Layered Hummingbird
Creating a stunning, multi-dimensional paper craft or vinyl decal project often feels like a daunting task for beginners. The promise of depth, shadow, and realism is incredibly appealing, but the execution can quickly become frustrating if you do not understand the underlying structure of digital cut files. This is where the 3D Layered Hummingbird comes into play. It is not just a single image; it is a carefully engineered blueprint for creating visual depth using standard crafting machines like Cricut or Silhouette.
However, before you download any file, there is a critical distinction that every creator must understand to avoid wasting time and materials. You are purchasing a DIGITAL FILE. There will be no physical product shipped to your address. If you expect a printed card, a finished plaque, or a tangible item in the mail, this listing is not for you. You will receive a zip file containing the raw data needed to create these items yourself. Understanding this upfront prevents disappointment and ensures you have the right tools—such as a printer, cutting machine, and adhesive—ready to go.
What Exactly Are You Downloading?
When you complete your purchase, you are not buying a picture of a hummingbird. You are acquiring a complex set of instructions for your cutting machine. The package typically includes a variety of file formats designed to work with different software and hardware setups. Specifically, you will receive:
- SVG (Scalable Vector Graphics): The industry standard for most modern cutting machines. This format allows you to resize the layers without losing quality.
- DXF: Essential for users working with older software versions or specific CAD programs.
- PNG: A raster image file useful for printing directly on cardstock or using as a reference guide during assembly.
- EPS: Often used by professional designers for vector editing in programs like Adobe Illustrator.
- PDF: Provides a printable guide that shows how the layers stack together.
The core feature of this design is its 19 Layers. A simple 2D hummingbird looks flat. By separating the wings, body, tail, and beak into nineteen distinct pieces, you can create a realistic sense of volume. Each layer represents a slice of the bird’s anatomy, stacked to form a cohesive whole. This complexity is what makes the final result so impressive, but it also requires patience and precision.
Common Pitfalls in Assembly
Even with high-quality files, many creators struggle with the final presentation. The difference between a amateur-looking craft and a professional-grade decoration often lies in the details of preparation and assembly. Here are common mistakes to watch out for.
Ignoring Material Thickness
One of the most overlooked aspects of layered designs is the thickness of your material. If you use thin tissue paper for all 19 layers, the resulting object may look fragile and lose its structural integrity. Conversely, using thick chipboard without adjusting the spacing can make the layers press too tightly against each other, flattening the intended 3D effect.
Better Approach: Experiment with mixed media. Use heavier cardstock for the base layers (like the main body) and thinner vellum or acetate for the wing overlays. This contrast not only adds durability but also enhances the visual depth by allowing light to pass through certain sections.
Skipping the Test Cut
Because there are 19 separate pieces, misalignment is a real risk. Cutting all layers at once on expensive glitter paper or metallic vinyl is a recipe for disaster if one layer shifts slightly during the process. A small shift in the first few cuts can compound, resulting in a hummingbird that looks distorted or asymmetrical.
Better Approach: Always run a test cut on scrap paper or cheap cardstock first. Check the alignment of the layers. Ensure that the inner curves of the wings match perfectly with the body outline. Once you confirm the registration is accurate, proceed with your premium materials.
Optimizing Your Workflow
To get the best results from your 3D Layered Hummingbird, organization is key. With nearly twenty individual components, keeping track of which piece goes where can be confusing. Without a system, you might find yourself gluing the tail feathers in the wrong order, leading to a tangled mess rather than a graceful flight pose.
- Lay Out Your Pieces: Before applying any glue, arrange all 19 layers on a clean surface according to the provided PDF guide. Label them with sticky notes if necessary.
- Use the Right Adhesive: For paper crafts, a fine-tip glue pen or double-sided tape dots work best. They provide precise application without warping the paper. For vinyl projects, clear acrylic blocks can help position layers before adhering them to the final backing.
- Work from Back to Front: Start gluing the furthest back layers (often the tail or background elements) and move forward toward the head. This prevents your fingers from smudging the delicate front layers while you work on the back.
Who Is This Design For?
This digital asset is versatile enough for various applications. Small business owners selling handmade wedding invitations can use the hummingbird as an elegant embellishment. Educators might incorporate it into biology lessons about avian anatomy. Hobbyists looking to challenge their cutting skills will appreciate the intricate detail required to assemble such a complex figure.
However, it is important to manage expectations regarding skill level. While the cutting process itself is automated by your machine, the assembly is manual and requires dexterity. If you are a complete beginner to paper crafting, this might be a steep learning curve. Consider starting with a simpler, single-layer design to get comfortable with your machine’s settings before tackling a 19-layer masterpiece.
Final Thoughts on Digital Purchases
Buying digital files offers incredible value and flexibility. You can print the 3D Layered Hummingbird as many times as you need for different projects. You can change colors, sizes, and materials without being limited by inventory. Just remember that the quality of your final output depends entirely on your preparation and technique.
Take the time to read the included instructions. Familiarize yourself with the layer order. Choose materials that complement the design’s intent. By avoiding common pitfalls like poor adhesion techniques or rushed assembly, you will transform a simple zip file into a breathtaking work of art. Enjoy the creative process, and let your imagination take flight with every layer you add.